How to Create a Group in Gmail: 5 Easy Steps (2026)
Lindy walked through creating Gmail groups in Google Contacts, covering contact-label setup, mobile differences, the BCC privacy trick, and when to switch to Google Groups.


I once sent a contract revision to the full client team, minus our legal contact. Nobody caught it until the client had already signed off on terms we hadn't cleared internally. Untangling that took the rest of the afternoon and a fairly uncomfortable call.
It happened because I was rebuilding the same recipient list from memory, like I did every time. Knowing how to create a group in Gmail would have taken three minutes and prevented the whole thing.
What is a Gmail group?
A Gmail group is a contact label in Google Contacts that collects multiple email addresses under a single name.
Type that label into the To field when composing, and Gmail automatically populates every address in the group. The setup happens in Google Contacts, not in Gmail itself, but once a label is created, it's available immediately when composing.
Before getting into the steps, it helps to know that Gmail groups come in two forms. A contact label is a personal distribution list that only you send from. A Google Group is a separate service that gives a team a shared email address anyone on the list can send from or receive to.
This guide covers both, starting with contact labels since that's what most people need.
How to create a group in Gmail (via Google Contacts)
This is the method that works for most use cases, including personal distribution lists, recurring team updates, client segments, and any situation where you regularly email the same set of people.
Step 1: Open Google Contacts
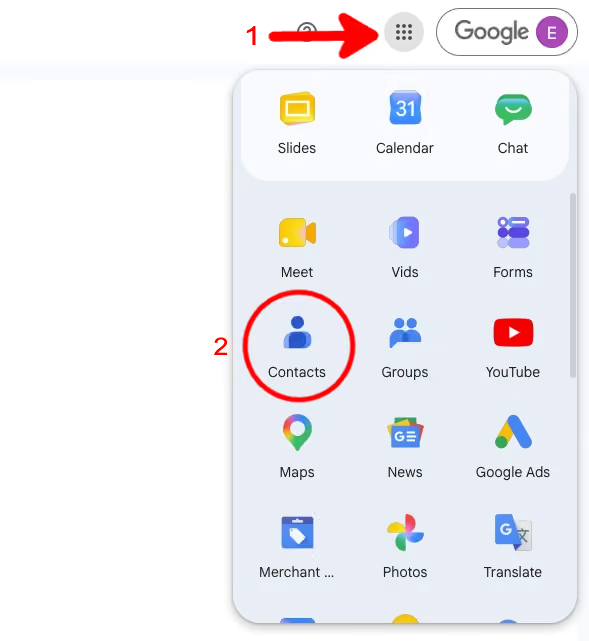
Go to contacts.google.com in your browser, or click the nine-dot grid icon in the top-right corner of your Gmail inbox and select Contacts.
Make sure you're signed into the same Google account you use for Gmail.
Step 2: Select the contacts you want to add
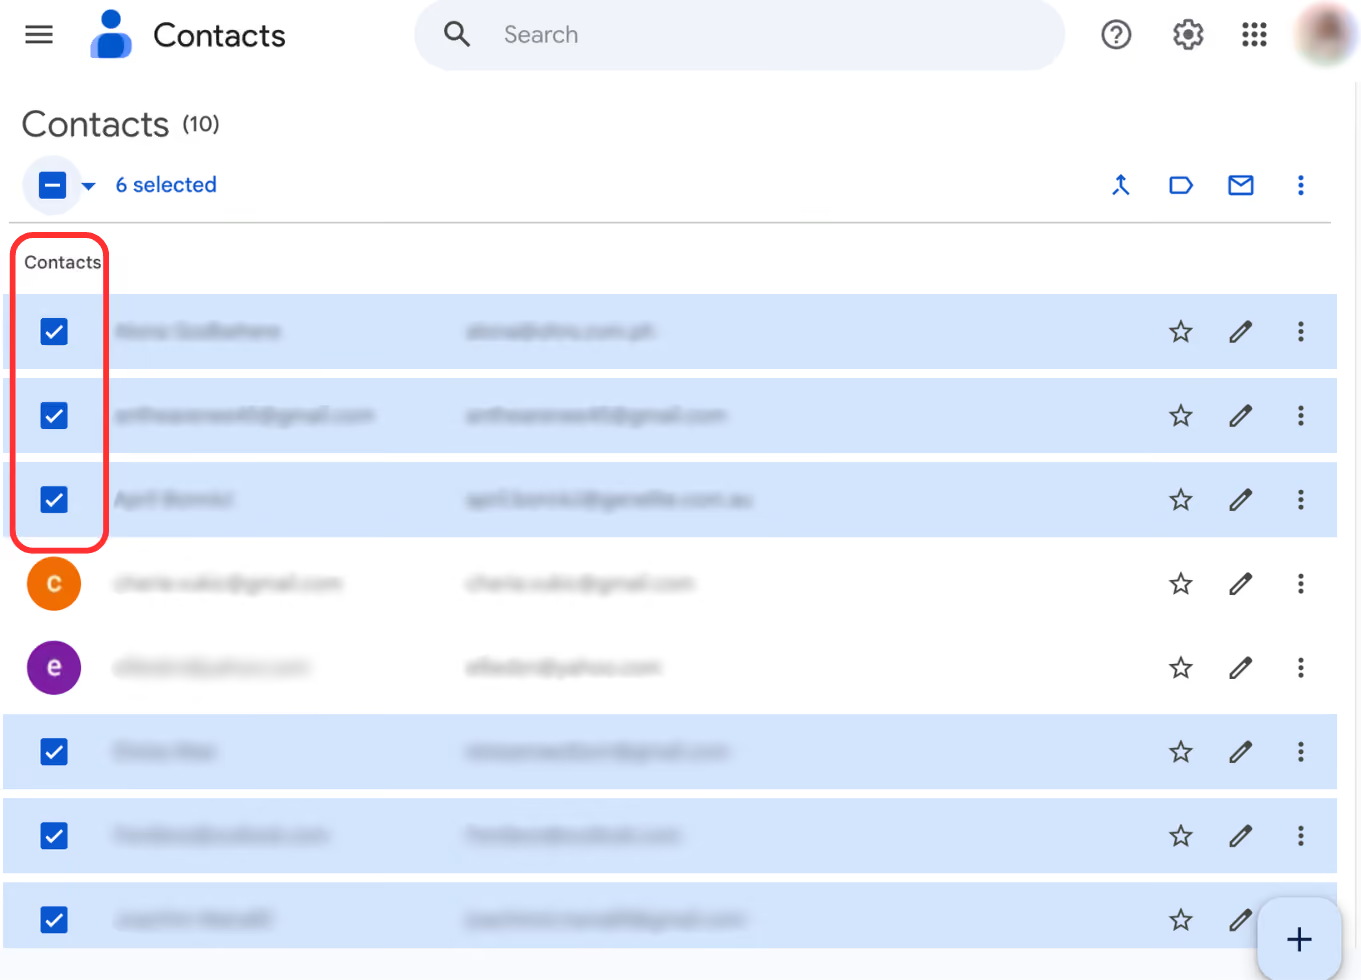
Hover over each contact and click the checkbox that appears next to their name. You can select as many as you need.
If someone you want to include isn't in your contacts yet, add them first by clicking Create contact.
Step 3: Create a new label

With your contacts selected, click the Manage labels icon in the top toolbar (it looks like a small tag). Then click Create label.
Give it a clear, recognizable name like "Project Alpha," "Sales Team," or "Client List Q1" and click Save. This label is your group. Once it's created, you can select it anytime you want to email everyone on the list at once.
Step 4: Verify the group
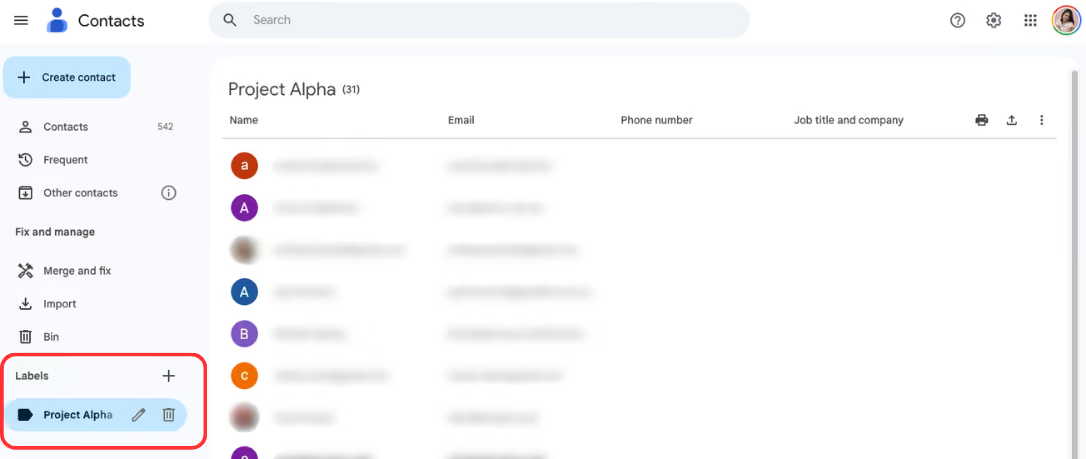
Click the label name in the left sidebar to confirm all the right contacts are there. This takes ten seconds and saves the frustration of discovering a missing name after you've already hit send.
Step 5: Use the group in Gmail
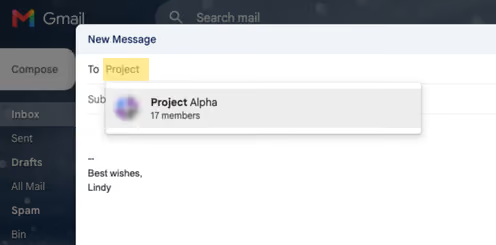
Open Gmail, click Compose, and start typing your label name in the To field. Gmail will suggest the group as an autocomplete option. Select it, and the individual addresses populate automatically. Write your message and send.
That's the full setup. Everything from this point forward is management and tips.
How to create a group in Gmail on mobile
This works differently depending on your phone. Android handles it all in the Contacts app, while iPhone has no way to create labels natively, so you'll need a desktop for that.
On Android:
Open the Google Contacts app. Tap the menu icon (three lines) in the top-left corner, then tap Create label.
Enter the label name and tap OK. Go back to your contacts, check the boxes next to the names you want to add, tap the Manage labels icon, select your label, and tap Apply.
On iPhone:
Creating contact labels is not supported in the Google Contacts iOS app. You need to create the label on desktop at contacts.google.com.
Once created, the label syncs automatically to your iPhone and is available when composing in the Gmail app. You can type the label name in the To field just like on desktop.
How to edit or manage your Gmail group
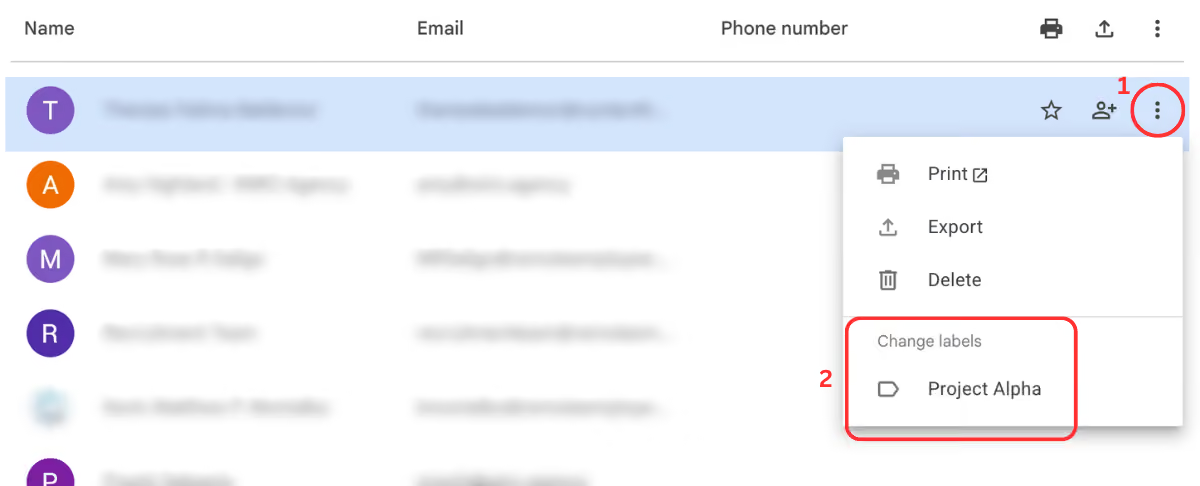
Add a contact: Go to Google Contacts, find the contact you want to add, hover over their name, click the three-dot menu, and select Manage labels. Check the relevant label and save.
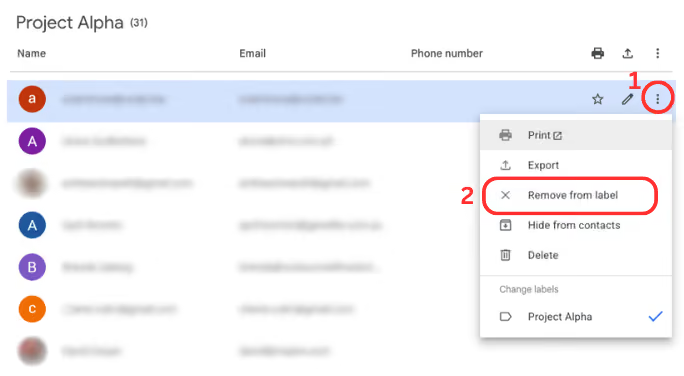
Remove a contact: Open the label in Google Contacts. Hover over the contact, click the three-dot menu next to their name, and select Remove from label.
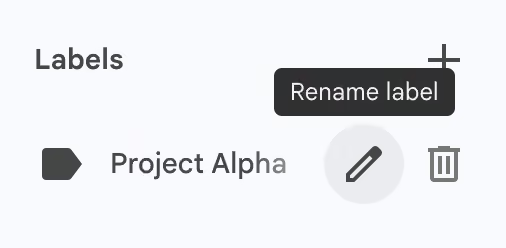
Rename the label: Hover over the label name in the left sidebar, click the pencil that appears, and select Rename Label. Type the new name and save. The updated name will appear in Gmail immediately.
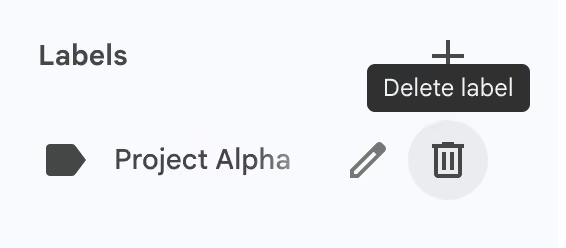
Delete the label: Hover over the label name in the left sidebar, click the Trash Bin, and select Delete. This removes the label but does not delete the contacts themselves.
How to send a group email in Gmail
Once your label is set up, sending is straightforward.
Open Gmail and click Compose. Type the label name in the To field and select the group from the autocomplete suggestions. Gmail expands the label and shows each individual address.
One thing to keep in mind: when you send to a group this way, every recipient can see every other recipient's email address in the To field.
For internal teams, that's usually fine. For larger or mixed lists where you don't want addresses exposed, use BCC instead.
Put your own address in the To field, click BCC in the compose window, and add the group label there. Everyone receives the email; no one sees the other recipients.
Gmail groups vs Google Groups: Which one do you need?
Gmail groups (contact labels) are a personal list you email from your own address, while Google Groups is a shared address multiple people can send from and reply to.
If you've followed the steps above and still need shared access or group-wide replies, Google Groups is likely the better fit.
Use Gmail groups if:
- You're the only one sending to this list
- The group is for your personal use (a team you manage, a client segment, a recurring distribution)
- You don't need a dedicated email address for the group
- You want a fast, no-setup solution
Use Google Groups if:
- You need a shared email address (like support@yourcompany.com or team@yourcompany.com) that multiple people can send from
- You want replies to go to the whole group
- You need membership management, a shared archive, or moderation controls
- Multiple people need to manage the group, not just you
For most professionals doing team updates, client communication, or project coordination, contact labels are sufficient. Google Groups is the right tool when you're building something more like a shared inbox or a distribution list others can subscribe to.
Tips for sending group emails in Gmail
- Create separate labels for To and BCC use cases: If you regularly send both internal updates (To, visible) and outbound announcements (BCC, private), keeping those as separate labels removes the need to think about it each time.
- Reply-all only reaches the sender: If your team expects group-wide visibility for replies, a Gmail label won't provide that. Google Groups is the better fit when reply-all matters.
Common mistakes to avoid when sending group emails in Gmail
Gmail groups are easy to set up, but a few habits can quickly undermine them. Here are the ones worth watching for.
Most of these come down to setup habits. Get the naming and verification right from the start, and the remaining mistakes mostly disappear on their own.
When Gmail groups aren't enough
Contact labels work well for one-way distribution. They start to show their limits when your email workflow becomes more complex: when you need replies tracked, follow-ups drafted, contacts updated in a CRM after a group send, or when managing multiple active lists eats into your day.
An AI assistant like Lindy covers the parts after the send: replies, follow-ups, and CRM updates.
Try Lindy: Take your Gmail workflow further with AI
Gmail groups handle the recipient list, but the drafting, follow-up tracking, and CRM logging around every send are still on you.
Lindy picks up where the label leaves off. Connect your inbox, tell Lindy what you need in plain English, and it takes care of the work around your emails so you're not doing it manually after every send.
Here is what that looks like in practice:
- Triage your inbox automatically: Lindy sorts incoming email into the labeled categories you set up, so your inbox is organized before you even open it.
- Draft replies in your voice: After a group send, Lindy can draft replies to responses you receive, using your tone and saving them for review before anything goes out.
- Track follow-ups on group emails: Lindy monitors sent emails that haven't received replies and drafts follow-ups at set intervals, so nothing slips through.
- Update your CRM after client group sends: After emailing a client list, Lindy can log the send and update relevant records in HubSpot or Salesforce without you opening the CRM.
- Delegate inbox tasks from anywhere: Text Lindy between meetings to check what needs a response, send a follow-up, or draft a new message without opening your inbox.
FAQs
1. Can I create a Gmail group on my phone?
On Android, you can create labels directly in the Google Contacts app. On iPhone, label creation requires the desktop version at contacts.google.com, but once created the label syncs to iOS and works in the Gmail mobile app.
2. What is the difference between a Gmail group and a Google Group?
A Gmail group (contact label) is a personal distribution list that only you send from. A Google Group creates a shared email address that multiple people can send from and receive to, with membership management and a shared archive.
Contact labels work for most individual use cases; Google Groups is better for teams' inboxes or managed mailing lists.
3. Can recipients see each other's email addresses in a Gmail group send?
Yes, when you send to a label in the To field, all recipients see all other addresses. To keep addresses private, add the label to the BCC field instead and put your own address in the To field.
4. Is there a limit to how many contacts can be in a Gmail group?
There is no stated limit on the number of contacts in a label. However, Gmail limits daily sends to 500 emails for free accounts and 2,000 for Google Workspace accounts, which effectively limits the number of recipients you can email in a single send.
5. Can multiple people use the same Gmail group?
No, contact labels are tied to your individual Google account, so only you can send from them. If you need a shared list that multiple team members can send from, Google Groups is the right tool.