


How to Schedule an Email in Gmail in 7 Easy Steps [2026]


If you want your email to land at the right time, Gmail’s built-in scheduling feature does that in a few clicks. I reviewed the steps, limits, and common mistakes, so you can schedule an email in Gmail without confusion.
How to schedule an email in Gmail: 30-second answer
To schedule an email in Gmail, first write your email in Gmail, then click the small arrow next to Send and choose Schedule send. Pick one of Gmail’s suggested times or choose your own date and time, then confirm.
Gmail will place the message in your Scheduled folder until its sending time. If you want to change anything later, open Scheduled, select the email, click Cancel send, make your edits, and schedule it again.
What you’ll need before you schedule an email
Gmail includes Schedule send by default for all customers. Here are a few basics you’ll need:
- A Gmail account
- A drafted email, or at least a clear idea of what you want to send
- Access to Gmail on your desktop browser or the Gmail app
- About one minute
How to schedule an email in Gmail: Step-by-step guide
First, let me show you how you can schedule an email on the desktop. Later, I’ll also cover how you can do the same on the mobile app. You’ll follow these simple steps:
Step 1: Write your email
Open Gmail and click Compose. Add your recipient, subject line, and message just like you normally would.
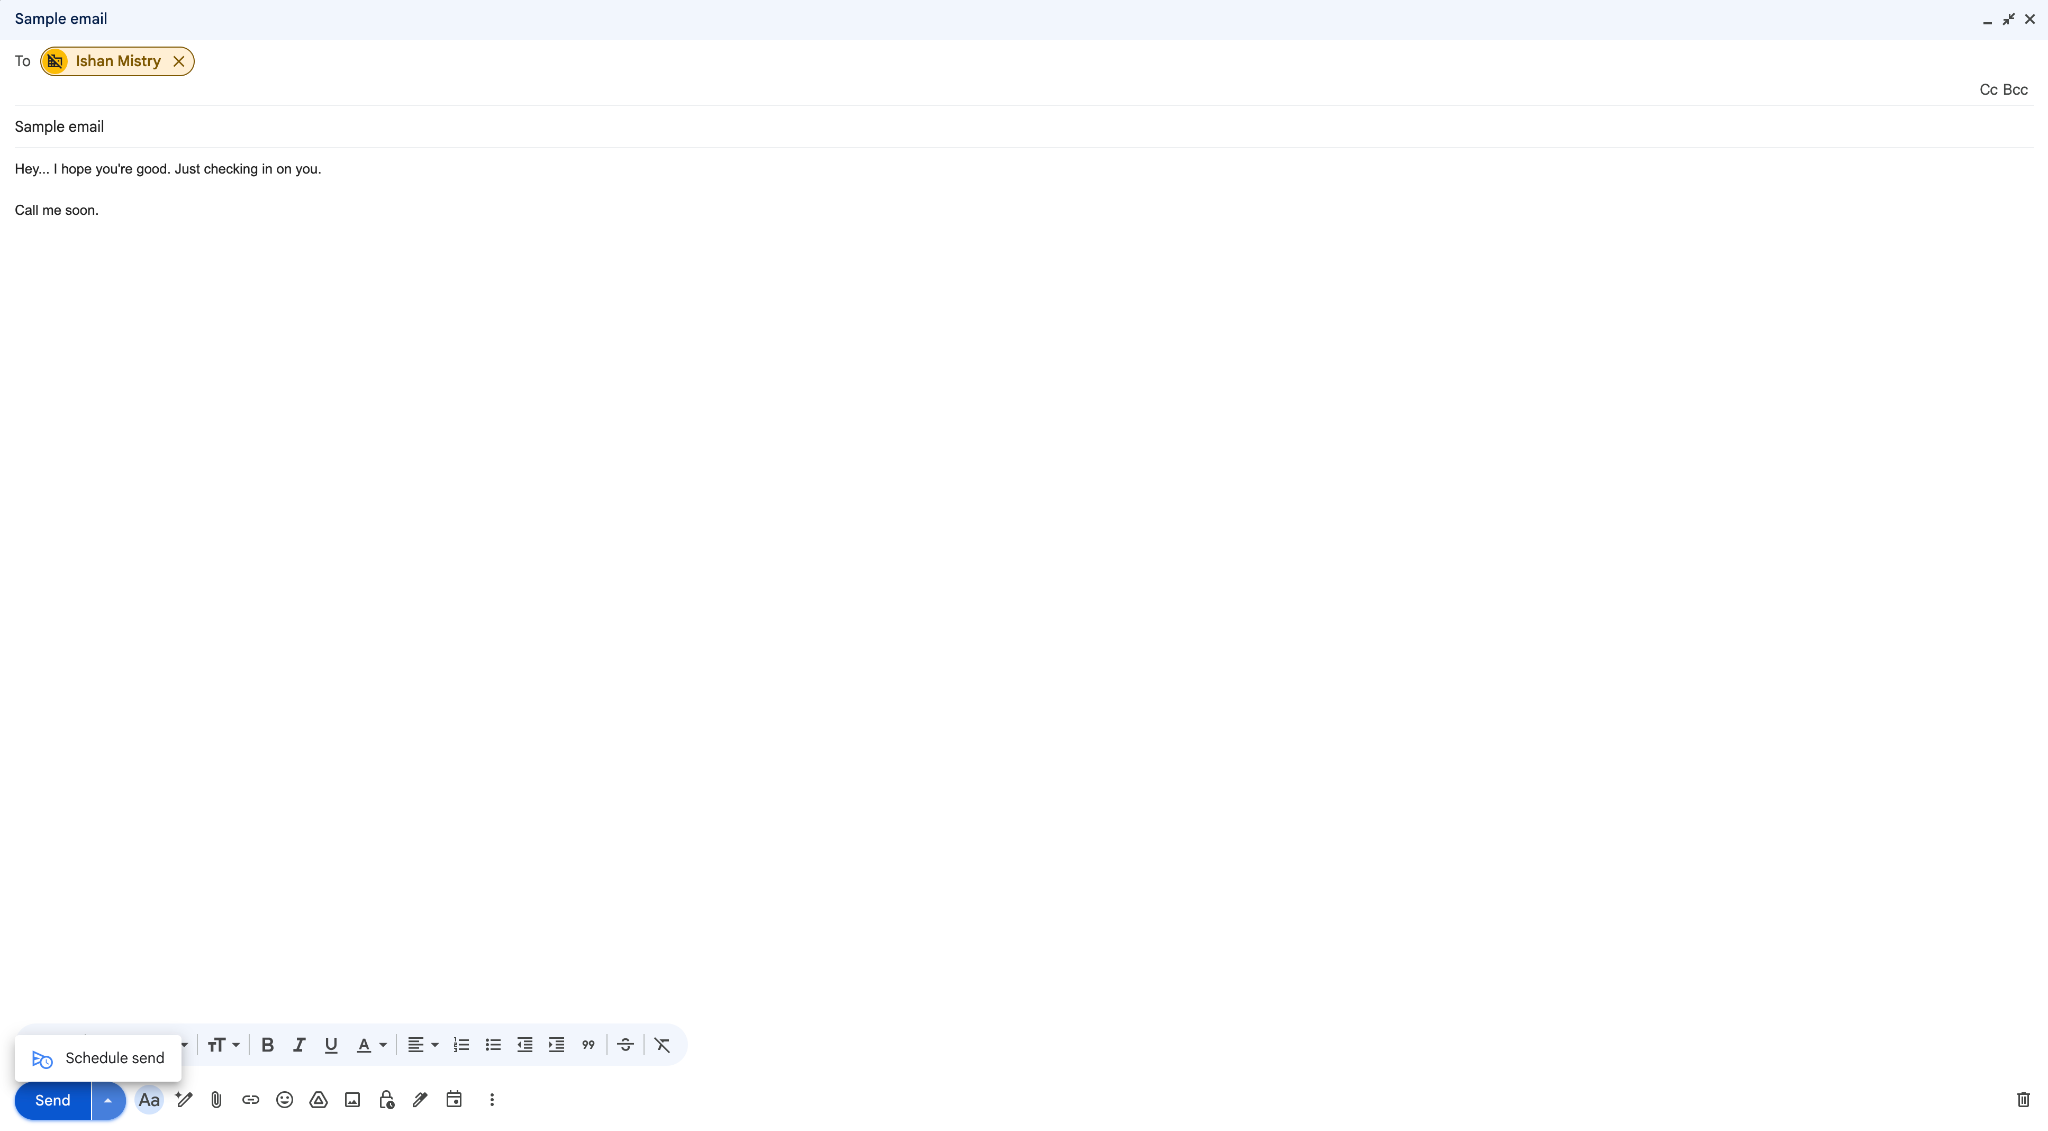
Before you schedule anything, check the basics, like the right recipient, subject line, and any links or attachments you want to include. I messed it up while trying the feature, and I had to cancel the email and start over again, wasting a lot of time.
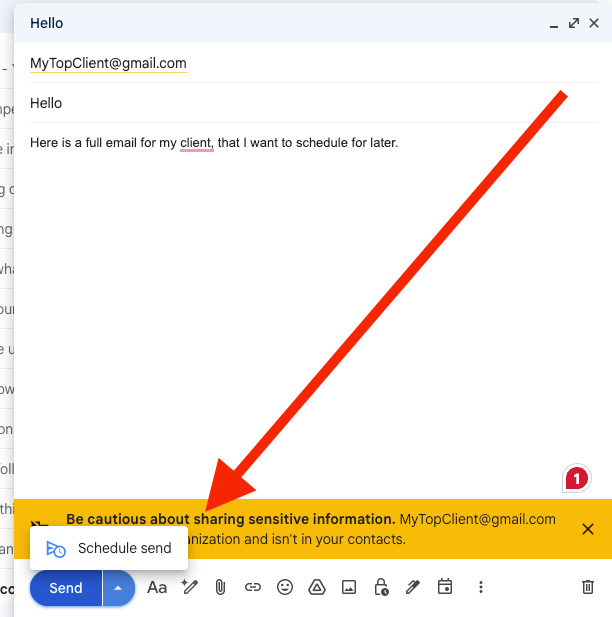
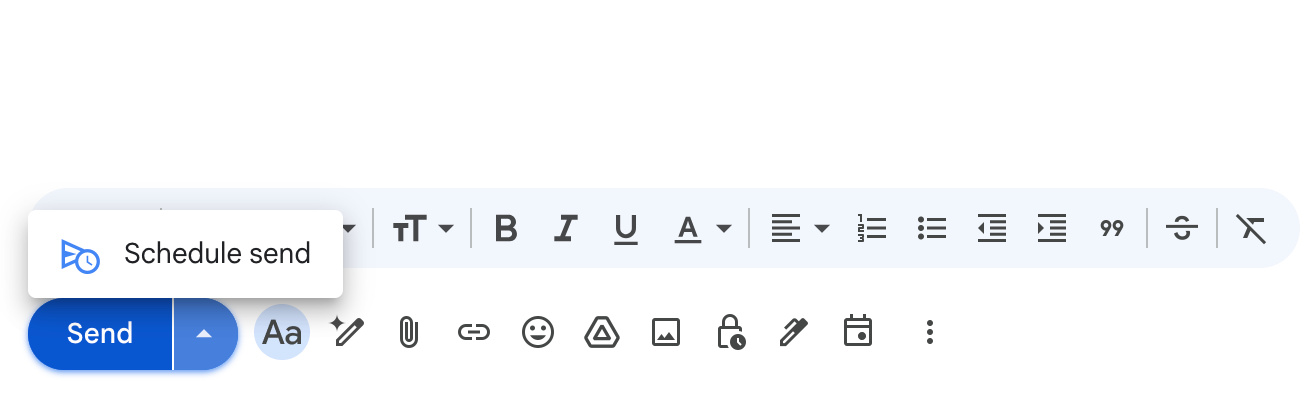
Step 2: Click the arrow next to Send
Look at the bottom of the compose window. You’ll see the blue Send button, along with a small down arrow beside it.
Click that arrow, not the main Send button. If you click Send, Gmail will send the message right away.
Step 3: Choose Schedule send
After you click the arrow, Gmail will open a small menu. Select Schedule send.
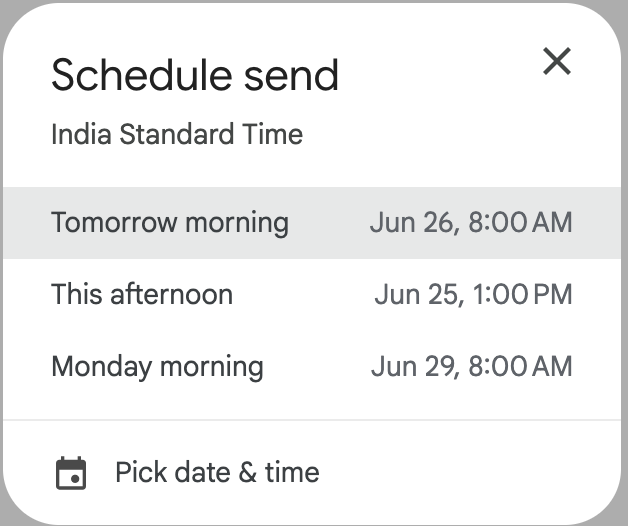
Gmail will then show a few suggested send times, such as tomorrow morning or Monday morning. I picked one of the suggested times as it suited me. You can, however, modify it to a time that works for you.
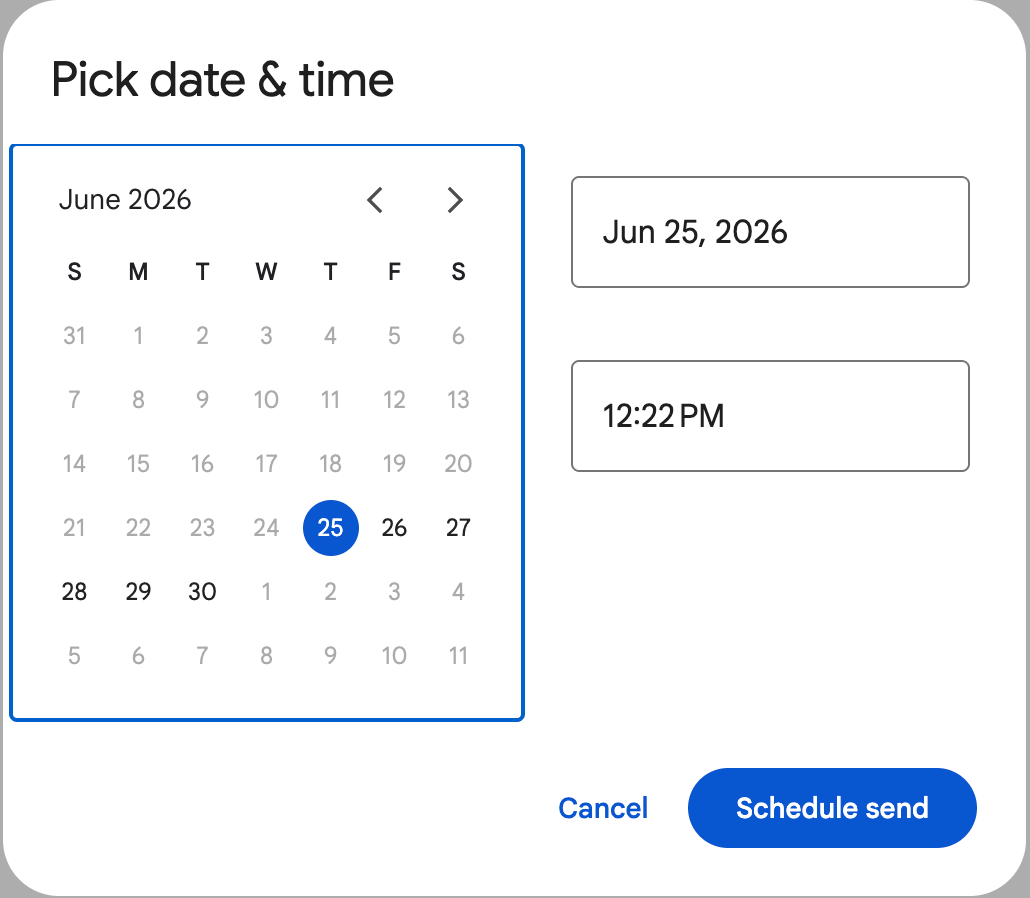
Step 4: Pick a date and time
If Gmail’s suggested options don’t fit, click Pick date & time. Then choose the exact day and time you want.
Think about when the recipient will likely read the email. If they work in another time zone, schedule the email for their local work hours, not yours. I recommend landing in their inbox during the morning hours. It seems more thoughtful, with a higher chance of being read.
Step 5: Confirm the scheduled email
Once you choose your date and time, click Schedule send to confirm. Gmail will show a quick confirmation message, and the email will move into your Scheduled folder.
At this point, you’re done. Gmail will hold the email until your chosen send time, then send it automatically.
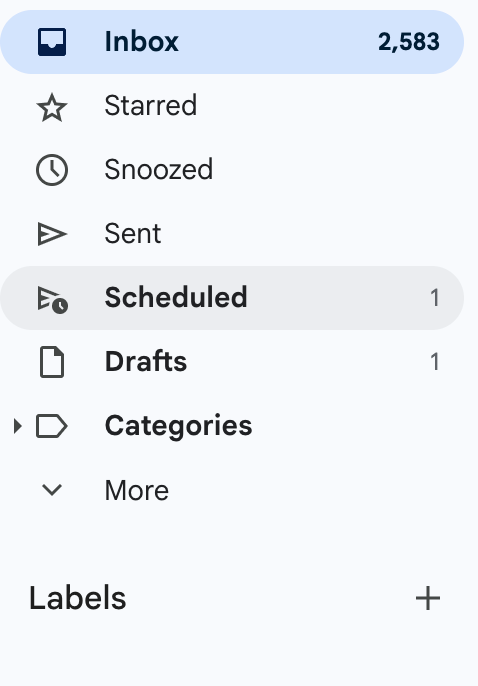
Step 6: Find your scheduled email
If you want to check that everything looks right, go to the left-hand sidebar in Gmail and click Scheduled. You’ll see every message you have queued up to send later.
Open any scheduled email to review it. It helps when you want to double-check the send time or ensure you scheduled the right message.
Step 7: Edit or cancel it if needed
If you need to change the subject line, message, recipient, or send time, open the scheduled email and click Cancel send. Gmail will move the email back to your drafts. I had to do this because I had entered the wrong email ID and forgot to cc my teammate.
Make your edits there, then repeat the same steps to schedule it again. If you no longer want to send it later, you can leave it in drafts or delete it altogether.
{{templates}}
How to schedule an email in Gmail on mobile
You can also schedule an email from the Gmail app on your phone. The steps are almost the same, but the option sits inside the menu instead of next to the Send button. Here’s how to do it:
- Compose: Open the Gmail app and tap Compose. Write your email, add the recipient, and check that everything looks right before you move on.
- The three dots: Click on the three dots at the top-right corner. In the menu that appears, tap Schedule send. Gmail will show a few suggested times, or you can choose a custom date and time.
- Scheduled: Once you confirm the schedule, Gmail will hold the email until that time and send it automatically. If you need to change it later, open the app menu, go to Scheduled, select the email, tap Cancel send, make your edits, and schedule it again.
The mobile version works well for quick follow-ups, reminders, or emails you write outside work hours but want to send later.
Common mistakes to avoid while scheduling an email
I discovered a few small mistakes that can throw off a scheduled email, especially if you’re moving quickly. Watch out for these:
- Clicking Send instead of the arrow: If you click the main Send button, Gmail sends the email right away.
- Choosing the wrong time zone: Gmail uses the time zone you schedule in, so double-check the send time for recipients in other regions.
- Scheduling something too time-sensitive: Gmail can send scheduled emails a few minutes later than planned, so don’t use this feature for last-second messages.
- Forgetting how edits work: When you click Cancel send, Gmail moves the email back to Drafts. You need to edit it and schedule it again.
- Confusing scheduled with recurring: Gmail handles one-time scheduled emails, not recurring emails that repeat every week or month.
How an AI assistant like Lindy can help manage your inbox
Scheduling emails is often a way to organize your inbox tasks. However, doing it manually can create new problems. Important emails get buried, follow-ups slip, and you lose a lot of time digging through threads.
Here’s where an AI assistant like Lindy can help.
Lindy works like an AI email assistant you can text when you need help with your inbox. Instead of manually managing your emails all day, you can ask Lindy to highlight priority emails, move unnecessary emails to trash, and draft and schedule replies on your behalf.
For example, you can text Lindy to:
- Scan your inbox and highlight priority emails
- Filter newsletters or low-priority messages
- Remind you to reply to important conversations
- Draft email responses using the context of the thread
- Send replies on your behalf when appropriate
- Help run email outreach or follow-up sequences
Try Lindy’s free trial to save time on your inbox management without a complex setup.
{{cta}}
Frequently asked questions
Can you edit a scheduled email in Gmail?
Yes, you can edit a scheduled email in Gmail, but only after you cancel it first. Open the email in Scheduled, click Cancel send, make your changes in Drafts, then schedule it again.
Can Gmail schedule recurring emails?
Gmail does not support recurring emails by default. You can schedule a message once, but Gmail won’t automatically resend that same email every day, week, or month. If you need recurring emails, you’ll need a separate tool or workaround.
Where do scheduled emails go in Gmail?
Scheduled emails go to the Scheduled folder in Gmail. On the desktop, you’ll find it in the left sidebar. On mobile, open the Gmail menu to see it.
Can you cancel a scheduled email in Gmail?
Yes, you can cancel a scheduled email in Gmail at any time before it sends. Open the email from Scheduled and click Cancel send. Gmail will move it back to Drafts.
Can you schedule emails in the Gmail app?
Yes, you can schedule emails in the Gmail app on Android and iPhone. Write your email, tap the three dots, then choose Schedule send and pick your time.
Can you schedule all emails by default in Gmail?
No, you can’t schedule all emails by default in Gmail. Gmail requires you to choose Schedule send manually for each email.
How many scheduled emails can Gmail hold?
Gmail can hold up to 100 scheduled emails at one time. If you reach that limit, you’ll need to send, cancel, or delete some before adding more.


Blog
Related Articles
%20(1).png)

%20(1).png)
%20(1).png)

.png)
%20(1).png)

%20(1).png)
The AI assistant that runs your work life
Lindy saves you two hours a day by proactively managing your inbox, meetings, and calendar, so you can focus on what actually matters.
