


How to Create a Business Email in 2026: 9 Easy Steps to Follow


Creating a business email seems daunting. You start by verifying your domain, configuring DNS settings, and suddenly you’re staring at MX records, SPF, DKIM, and DMARC like you accidentally signed up for an IT certification.
So, I reviewed the setup process across Google Workspace, Microsoft 365, Zoho, and other popular email providers to learn how to create a business email.
I realized that it’s not as technical as it looks. Here’s how to create a business email step-by-step, plus how to avoid the common setup mistakes that can stop emails from reaching the inbox.
What is a business email?
A business email is an email address that uses your company’s domain name, like maya@freshforkcatering.com or support@freshforkcatering.com, so that it’s more professional and distinctive for your organization.
Instead of sending invoices, proposals, or customer updates from a generic Gmail or Outlook email address like freshforkcatering@gmail.com, you send them from an address your business owns. This way, it ties every message back to your brand.
Customers can recognize who emailed them before they open the message. Vendors can find your company faster. And your team can use consistent addresses like sales@, support@, billing@, or hello@ as the business grows.
A business email doesn’t require a full website, but it does require a domain name. So if you want name@yourcompany.com, you need to own yourcompany.com first. After that, an email hosting provider like Google Workspace, Microsoft 365, or Zoho Mail can run the inbox for you.
What you need before you create a business email
I highly recommend knowing about the essentials, like the domain name and email host, before creating a business email. It makes the setup much easier. It also helps when your email provider asks you to verify your domain or update DNS records.
Here’s what you’ll need:
- A domain name: It’s the part after the @ symbol, like freshforkcatering.com. If you don’t have one yet, you can buy it through a domain registrar or through some email hosting providers during signup.
- An email hosting provider: An email hosting provider hosts your inbox. Common options include Google Workspace, Microsoft 365, Zoho Mail, Proton Mail, Titan, and similar providers.
- Access to your domain settings: You’ll need this to prove that you own the domain and to route emails to your new inbox. These settings are usually inside your domain registrar account.
- Your preferred email format: Decide whether you want addresses like maya@company.com, maya.patel@company.com, or hello@company.com. Pick one format early, so your email addresses stay consistent as your team grows.
- A strong password and recovery email: Use a password you don’t use anywhere else. Also, add a backup email or phone number, so you can recover the account if you lose access.
Most small business owners can finish the basic setup in 30 to 60 minutes. DNS updates can take longer to spread across the internet, but many providers start receiving email within a few minutes.
4 email setup terms you need to know
Business email setup gets confusing because providers throw technical terms at you before explaining what they mean. I am not an IT admin, and you don’t need to become one either.
You only need to understand these 4 basic terms:
Domain name
The domain name is the online business address, like freshforkcatering.com. It also becomes the second half of your email address. So if my domain is freshforkcatering.com, I can create addresses like:
- maya@freshforkcatering.com
- orders@freshforkcatering.com
- support@freshforkcatering.com
You can buy a domain from a domain registrar, your website host, or some email hosting providers.
Email hosting
Email hosting is the service that runs your inbox.
Your domain gives you the name. Your email host gives you the mailbox where messages arrive, get stored, and are sent from. Google Workspace, Microsoft 365, Zoho Mail, Proton Mail, and Titan are common email hosting options.
Think of it this way: Your domain is the address on the envelope, and your email host is the post office that receives and sends the mail.
MX records
MX records, or Mail Exchange records, tell the internet where to deliver emails sent to your domain.
When someone emails hello@freshforkcatering.com, MX records point that message to my email host. Without the right MX records, my business email address may exist, but messages won’t reach my inbox.
The email provider will offer the exact MX records to copy. You’ll paste them into your domain settings.
SPF, DKIM, and DMARC
SPF (Sender Policy Framework), DKIM (DomainKeys Identified Mail), and DMARC (Domain-based Message Authentication, Reporting, and Conformance) help prove that your emails come from you.
They reduce the chance that someone can fake emails from your domain. They also help email providers trust your messages, which can improve your chances of landing in the inbox instead of spam.
I’ve simplified it for you:
- SPF says which services can send emails from your domain.
- DKIM adds a digital signature to your emails.
- DMARC tells email providers what to do when a message fails those checks.
Most email hosts give you copy-and-paste records for all three. Set them up before you use your new business email with customers.
{{templates}}
How to create a business email: A step-by-step guide
Creating and setting up a business email becomes easy once you understand the basic terms. Most providers use slightly different labels, but the process usually follows the same path.
Here are the steps to follow:
Step 1: Choose or buy your domain name
Start with your domain name. It’s the part that comes after the @ symbol in your business email. If you want maya@freshforkcatering.com, you need to own freshforkcatering.com.
If you already have a domain, keep your login details ready. You’ll need access to your domain settings later.
If you don’t have one yet, choose a short, clear domain that matches your business name as closely as possible. Avoid numbers, hyphens, hard-to-spell words, or trendy phrases that may look dated in a year.
A good domain looks like:
- freshforkcatering.com
- smithlegalgroup.com
- northstarbookkeeping.com
A weaker domain looks like:
- fresh-fork-catering-2026.com
- smithlegalgroup123.com
- bestbookkeeping4u.net
If setup speed matters more than flexibility, buy your domain through the same provider you’ll use for email. This often reduces manual DNS work.
Step 2: Pick an email hosting provider
Popular options include Google Workspace, Microsoft 365, Zoho Mail, Proton Mail, Titan, and similar providers. They all help you create a business email with your own domain, but they differ in price, storage, security, apps, and setup experience.
For most small businesses, the best provider depends on how you already work. Here’s how to decide:
- Choose Google Workspace if your team already uses Gmail, Google Drive, Calendar, and Docs.
- Choose Microsoft 365 if your team works heavily in Outlook, Word, Excel, Teams, and OneDrive.
- Choose Zoho Mail, Proton Mail, Titan, or another provider if you want a lower-cost option, stronger privacy focus, or a simpler email-first setup.
Before you choose, compare:
- Monthly cost per user
- Storage per inbox
- Free trial or free plan limits
- Security features
- Calendar and contact tools
- Mobile app quality
- Migration support
- Customer support
Don’t overthink this step. Pick a provider you can use comfortably every day.
Step 3: Create your email account
After you sign up, your provider will ask you to create your first mailbox. For solo founders, a simple address like firstname@company.com works well. It feels personal and easy to remember.
For growing teams, use a more consistent format like:
- firstname.lastname@company.com
- firstinitiallastname@company.com
- firstname@company.com
You can also create role-based addresses, such as:
- hello@company.com
- sales@company.com
- support@company.com
- billing@company.com
These addresses work well when more than one person may handle the same type of message.
Pick one naming format and stick with it. A team with maya@company.com, james.wilson@company.com, and rachel_support@company.com can look messy.
Step 4: Verify your domain
Your email provider needs proof that you own the domain. To verify it, the provider will usually give you a short TXT record. You copy that record, open your domain settings, and paste it into the DNS area.
It sounds technical, but the action itself is simple. Just copy from one screen, paste into another.
After you add the record, go back to your email provider and click the verify button. Verification can happen in a few minutes, but some domains take longer.
Step 5: Add MX records
Now, you need to tell the internet where to send emails for your domain. Your email provider will give you MX records. Use the exact MX records and copy them into your domain’s DNS settings.
Once you add the right MX records, emails sent to you@company.com will go to your new inbox.
If your domain already has old MX records from another provider, remove them only after you confirm your new provider’s instructions. Two competing email setups can cause delivery problems.
Step 6: Set up SPF, DKIM, and DMARC
After MX records, set up your email security records. SPF, DKIM, and DMARC help other inboxes trust your emails. They also make it harder for someone to fake messages from your domain.
Your provider will usually give you copy-and-paste DNS records for each one. Understand what each record does:
- SPF lists the services allowed to send emails from your domain.
- DKIM adds a signature that proves your email came from your domain.
- DMARC tells inboxes what to do if an email fails those checks.
Set these up before you send customer emails, proposals, invoices, or outreach campaigns.
After setup, use your provider’s built-in domain check tool if it offers one. It can confirm whether your records work properly.
Step 7: Create aliases and shared addresses
Once your main inbox works, create the extra addresses your business needs. Aliases let you receive emails sent to different addresses without paying for a full new inbox every time.
This way, you can route multiple emails like hello@company.com, info@company.com, and press@company.com to your main inbox.
Shared addresses work better when a team needs to manage the same inbox. For example, support@company.com may need shared access for your customer service team.
Aliases work well for simple routing, while shared inboxes are ideal when multiple people need to read, reply, and track messages together.
Step 8: Set up email on desktop and mobile
Next, connect your new business email to the apps you use daily. Most providers let you access your email through:
- Webmail
- Gmail app
- Outlook app
- Apple Mail
- Native iPhone or Android mail apps
Sign in on your laptop and phone, then check that your inbox, sent folder, calendar, and contacts sync properly.
If your provider gives you a dedicated mobile app, start there. It usually gives you the fewest setup issues.
Step 9: Send test emails
Send emails to a few different accounts, such as Gmail, Outlook, Yahoo, and your personal inbox. Then, reply from those accounts to make sure incoming and outgoing messages work.
Check these:
- Did the email arrive?
- Did it land in the inbox or spam?
- Does your sender name look right?
- Does your signature display properly?
- Can you receive replies?
- Does everything sync on mobile?
Fix these issues while setting up your email, not after you send a proposal or invoice to a client.
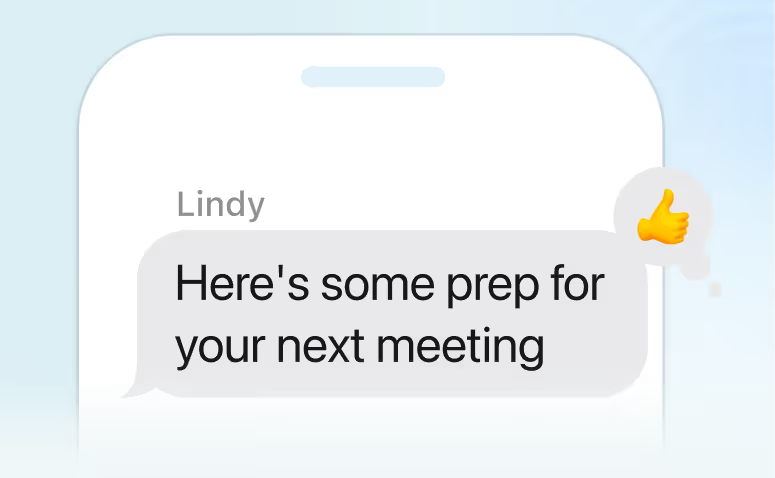
How Lindy helps you run your business email with AI
The business inbox itself can turn into a job pretty fast. Customer questions, sales replies, invoices, meeting follow-ups, and vendor updates all land in the same place. That’s where an AI assistant like Lindy can help.
Lindy doesn’t create your domain or configure DNS records for you. You’ll still need to finish the setup steps above first. After that, you can connect Lindy to your inbox and text it to help with the email work that comes next.
You can text Lindy to manage your inbox, draft replies, send follow-ups, update your CRM, and handle other daily tasks. Instead of jumping between email, calendar, Slack, and your CRM, you can ask Lindy to help move the work forward.
For example, you can ask Lindy to:
- “Scan my inbox and show me the emails I need to reply to today.”
- “Draft a reply to this customer asking about pricing.”
- “Remind me to follow up with this lead in 3 days.”
- “Summarize this long email thread.”
- “Send a follow-up email to everyone who hasn’t replied.”
- “Update HubSpot with the details from this email.”
That makes Lindy useful beyond basic inbox cleanup. A business email often creates downstream tasks, like writing a reply, booking a meeting, updating the CRM, notifying your team, and reminding yourself to check back later. It can help with those repetitive tasks.
Lindy also connects with Gmail, Outlook, Slack, HubSpot, Notion, and hundreds of other apps, so your email tasks don’t stay trapped in your inbox.
Lindy provides ready-to-use skills to help you get started quickly. Whether you need to parse email attachments, triage your inbox, or summarize a thread, you can use these skills and customize them to fit your specific workflows. It is also SOC 2, HIPAA, GDPR, and PIPEDA compliant, so your email data stays protected.
For those new to AI or looking to expand their knowledge, Lindy Docs offers comprehensive guides and tutorials. It helps you learn how to use Lindy for your everyday tasks.
Try the Lindy free trial today to offload repeat business email tasks.
Can you create a business email for free?
Yes, you can create a business email for free. Some providers offer a free plan with limits. Others offer a free trial that turns into a paid plan once the trial period ends.
Some website hosts include email when you buy hosting. And some domain providers bundle a basic mailbox with your domain purchase.
Keep these differences in mind:
- Free plan: You can use it long term, but you may get limited storage, fewer users, fewer security features, or no desktop email app support.
- Free trial: You can test the service for a short period, but you’ll need to pay once the trial ends.
- Bundled email: Your website host or domain registrar may include an email with another purchase. It can work well for basic inboxes, but check storage, spam protection, and support before relying on it.
- Paid business email: You pay per user each month. It’s usually the best option for a business as it gives you better security, support, storage, admin controls, and app access.
For a solo business, a free plan may work in the beginning. For a team, paid business email usually makes more sense because you’ll need reliable access, stronger security, shared addresses, and better account recovery.
The main thing is to read the limits before you commit. A free inbox isn’t helpful if you outgrow the storage in a month or can’t connect it to the tools you already use.
{{cta}}
Common mistakes to avoid when creating a business email
Creating a business email is simple, but like most users, I’ve made some errors while setting it up. Those errors created confusion later. Here are the ones I’d ask you to avoid:
Personal email address for business
A free email address like freshforkcatering@gmail.com can work when you’re testing an idea. But once customers, vendors, or clients start emailing you, a domain-based address looks more credible.
Use hello@freshforkcatering.com or maya@freshforkcatering.com instead. It makes your business easier to recognize and keeps your personal inbox separate.
Hard-to-read or confusing domain name
Your domain should be easy to say, spell, and remember. Avoid extra numbers, hyphens, and words that don’t match your business name.
A domain like freshforkcatering.com works better than fresh-fork-catering-2026.net.
Before you buy a domain, say it out loud. If you need to explain the spelling every time, choose something simpler.
Wrong or no SPF, DKIM, and DMARC values
SPF, DKIM, and DMARC help email providers confirm that your messages come from your domain. Without them, your emails may look suspicious, especially when you send invoices, proposals, or outreach emails.
Inconsistent email formats
Pick one format before you add more people. Choose firstname@company.com or firstname.lastname@company.com, then use that pattern for everyone. It also makes future addresses easier to guess and manage.
One shared inbox with universal access
A shared inbox like support@company.com can help your team manage customer questions. But it shouldn’t replace personal work emails. Give each team member their own address. Use shared addresses for departments, customer support, billing, or sales inquiries.
It keeps ownership clear and makes account security easier.
No updates to your business profiles
After you create your new email, update it everywhere customers may contact you. Check your website, contact forms, Google Business Profile, invoices, proposals, social media pages, email signatures, and booking tools.
Otherwise, new customers may still send messages to your old inbox.
No tests before sending customer emails
Always test your setup before you use the new address with customers. Send emails to Gmail, Outlook, Yahoo, and your personal inbox. Reply to those emails. Check spam folders. Test your phone app. Open your signature on desktop and mobile.
A quick test can catch delivery issues before they affect a client conversation.
What to do after creating your business email
Once your business email works, take some time for a few extra updates. They help you look more professional. Here’s what you can do after creating your business email:
Add a professional email signature
Create a simple signature with your name, role, company name, website, and phone number.
A sample signature I’d recommend:
Maya Patel
Owner, Fresh Fork Catering
freshforkcatering.com
(555) 123-4567
Keep it clean. Avoid giant images, long quotes, or too many links. A simple signature loads faster and looks better on mobile.
Update your website and contact forms
Replace your old email address on your website, contact page, booking forms, and lead forms. Then test every form. Submit a test inquiry and check whether it reaches the right inbox.
Many businesses update the visible email address but forget the backend form notification address.
Update your business profiles
Change your email address on your Google Business Profile, social media pages, directory listings, invoices, proposals, contracts, and booking tools. Customers may find your email in more places than you remember, so check every customer-facing profile you use.
Set up aliases for common questions
Create aliases like hello@, sales@, support@, and billing@ if your provider supports them. These addresses make your business look organized, even if all messages route to one inbox in the beginning.
As your team grows, you can move these aliases into shared inboxes or assign them to specific people.
Move important emails from your old inbox
If you used a personal email address before, move important customer conversations, invoices, and vendor details into your new account. You don’t need to migrate every old email. Start with the ones tied to active customers, open projects, unpaid invoices, or legal records.
Tell key contacts about the new address
Send a short note to customers, vendors, partners, and contractors that you’ve updated your email address. You can keep it simple.
Take this example:
Hi, I’ve updated my business email. Please use maya@freshforkcatering.com for future messages.
Keep your old inbox active for a while so you don’t miss replies from people who saved the previous address.
Turn on recovery and admin controls
Add a recovery email, backup phone number, and two-factor authentication. If you have a team, keep at least one backup admin account. It helps you avoid lockouts if someone leaves the company or loses access to their account.
Frequently asked questions
Can I create a business email without a website?
Yes, you can create a business email without a website. You only need a domain name and an email hosting provider. A website helps customers learn more about your business, but it isn’t required to create an email address like name@company.com.
Do I need a domain to create a business email?
Yes, you need a domain to create a proper business email. The domain is the part after the @ symbol, like company.com. Without a domain, you can still create an email account, but it won’t be a branded business email.
Can I use Gmail for my business email?
Yes, you can use Gmail for your business email through Google Workspace. It lets you use Gmail with your own domain, so your address looks like name@company.com instead of name@gmail.com.
How much does a business email cost?
A business email can cost $7-$10 per user per month with mainstream providers like Google Workspace or Microsoft 365, although budget options like Zoho Mail start lower.
How long does it take to create a business email?
Creating a business email usually takes 30 to 60 minutes. The inbox setup can finish quickly, but DNS records may take longer to update across the internet.
What is the best business email format?
The best business email format is something simple and consistent, like name@company.com or firstname.lastname@company.com. They keep things clean as your company scales and your team grows.


Blog
Related Articles
%20(1).png)
%20(1).png)

%20(1).png)
%20(1).png)
%20(1).png)
%20(1).png)
The AI assistant that runs your work life
Lindy saves you two hours a day by proactively managing your inbox, meetings, and calendar, so you can focus on what actually matters.
